Add Image to HTML – From Basic Syntax to Advanced Techniques
This article will explore various methods for adding images to HTML, from basic <img> tags to advanced techniques like using CSS and JavaScript. It also covers best practices for performance and accessibility and provides HTML examples to help you easily integrate images into your web projects.
Images in HTML
If web pages were just text, they would be pretty boring. Images and other types of media play a crucial role in making content visually appealing, engaging, and informative. So, adding images to HTML is a fundamental part of web development.
Image Formats. Choosing the right image format affects loading speed and quality:
- JPEG – the best for photographs and complex images;
- PNG – supports transparency, ideal for icons and logos;
- SVG – scalable vector format great for web graphics;
- GIF – supports animation but limited to 256 colors;
- WebP – modern format with superior compression and quality.
For optimal performance and SEO, compress images to reduce file size and use descriptive filenames to improve search visibility.
Note: Search engines also read image filenames and consider them for search query optimization. So give your images meaningful names: landscape.jpg is better than img1.jpg.
Adding Images Using <img> Tag
The simplest way to add an image to an HTML page is by using the <img> tag. To place an image on a web page, you need to use the <img> tag. This element does not contain a closing tag and requires the use of at least one attribute – src, which contains the path to the image you want to embed in the page. However, for better SEO, we recommend using other attributes as well. The key attributes include:
src– specifies a URL pointing to the image you want to embed in the page. This can be a relative URL, an absolute URL, or Base64-encoded data. Without thesrcattribute, the<img>element has no image to load.alt– provides alternative text for accessibility and SEO. Alt text should give the image’s intent, purpose, and meaning.widthandheight– specify the width and height of the image in pixels. If thewidthandheightare not specified, the web page may flicker while the image is loading.
If your image is called landscape.jpg and is in the same directory as your HTML page, you can embed it as shown below:
1<img src="landscape.jpg" alt="Summer landscape – a field with windmills." width="400" height="150">Note: Many images on the Internet are copyrighted. Violating copyright is illegal. If you did not create the image and took it from the web, you should make sure that the image is in the public domain or you have permission to use it.
Adding Images from Different Sources
Images in HTML can be added using local file paths, remote URLs, or embedded directly with Base64 encoding.
Local Images
Using local images is often better than remote images because they load faster, reduce dependency on external servers, and ensure availability even if the internet connection is slow or the remote server is unavailable. Local images also improve security by preventing potential tracking or unauthorized changes from third-party sources.
If the image is in an images subdirectory in the same directory as the HTML page, you can embed it like this:
1<html>
2 <body>
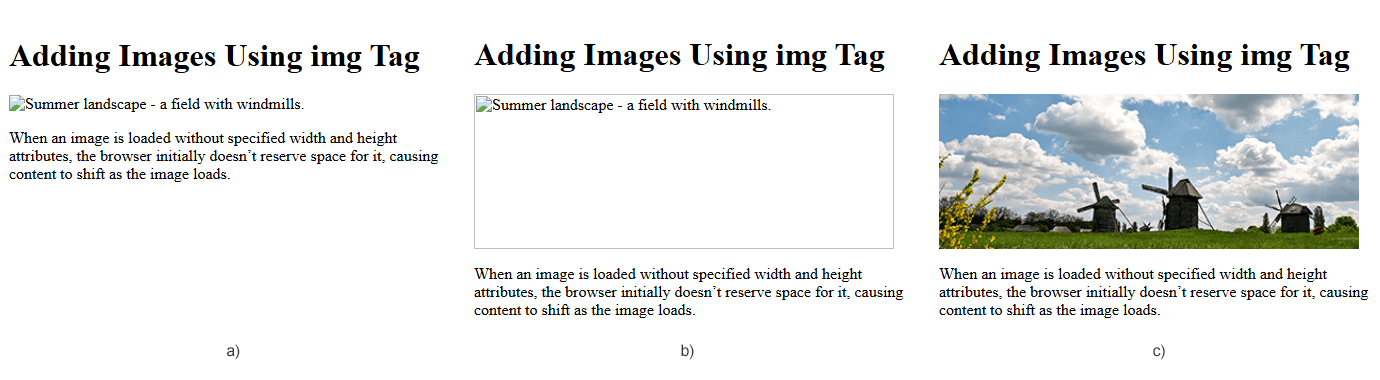
3 <h1>Adding Images Using img Tag</h1>
4 <img src="images/landscape.png" alt="Summer landscape – a field with windmills." width="400" height="150" >
5 <p>When an image is loaded without specified width and height attributes, the browser initially doesn’t reserve space for it, causing content to shift as the image loads.</p>
6 </body>
7</html>Image Width and Height
When an image is loaded without the width and height attributes specified, the browser does not initially reserve space for it, causing the content to shift as the image loads. This phenomenon negatively impacts the user experience, making the page appear unstable, especially on slower connections. By specifying width and height, the browser can allocate space for the image before it loads, preventing sudden shifts in layout. This practice not only improves visual stability but also improves core web metrics, helping to improve SEO and overall site performance.
The figure below shows examples of web pages: without reserved space for an image that has not yet loaded (a); space is reserved on the web page for the image since the height and width attributes were specified in the <img> tag (b); a web page with an image loaded (c).
Note: When a web page loads, the browser retrieves the image from the web server at the path specified in src and inserts it into the page. If the image is missing, the browser shows a broken link icon and the alt text.
Remote Images
An absolute file path is the full path to the image file, starting from the root of the web server or using a full URL. You could also embed the image using its absolute URL, for example:
1<img src="https://docs.aspose.com/svg/images/api/lioness.jpg" alt="The muzzle of a lioness close-up." width="350" height="200" >However, using absolute URLs is not recommended. Whenever possible, you should host the images you want to use on your site, which, in simple setups, means storing the images for your site on the same server as your HTML.
Base64 Encoding
Base64 encoding allows images to be embedded directly into HTML as data URIs, eliminating the need for separate image files. This reduces HTTP requests, improving loading times for small images or icons. However, Base64-encoded images increase the size of the HTML file, which can impact performance. They are best used for embedded graphics, such as logos or small UI elements, rather than large images.
This code snippet demonstrates how you can embed Base64 images in HTML:
1<img src="data:image/svg+xml;base64,PHN2ZyB3aWR0aD0iMzAwIiBoZWlnaHQ..." alt="Red circle" width="300" height="200" >The following HTML code shows how to add an image to an HTML file from three different types of image sources:
1<html>
2 <body>
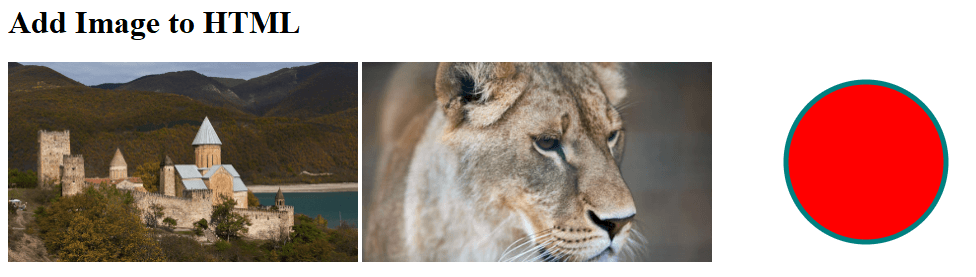
3 <h1>Add Image to HTML</h1>
4 <!-- Adding image to HTML using local path -->
5 <img src="images/georgia-castle.png" alt="Ananuri fortress complex in Georgia" width="350" height="200" >
6
7 <!-- Adding image to HTML using absolute URL -->
8 <img src="https://docs.aspose.com/svg/images/api/lioness.jpg" alt="The muzzle of a lioness close-up." width="350" height="200" >
9
10 <!-- Adding image to HTML using Base64 encoded data -->
11 <img src="data:image/svg+xml;base64,PHN2ZyB3aWR0aD0iMzAwIiBoZWlnaHQ9IjIwMCIgeG1sbnM9Imh0dHA6Ly93d3cudzMub3JnLzIwMDAvc3ZnIj4NCiAgICA8Y2lyY2xlIGN4PSIxNTAiIGN5PSIxMDAiIHI9I
12 jgwIiBzdHlsZT0iZmlsbDpyZWQ7IHN0cm9rZS13aWR0aDo1OyBzdHJva2U6dGVhbCIgLz4NCjwvc3ZnPg==" alt="Red circle" width="300" height="200" >
13 </body>
14</html>The image illustrates the HTML file written above. We see three images loaded from a local file, a remote source URL, and via Base64 encoded data.
Summarize
- Use
<img>Tag – Add images withsrc,alt,width, andheightattributes. All of these attributes are important for accessibility and SEO. - Choose the Right Format – Use JPEG (photos), PNG (transparency), SVG (scalable), WebP (optimized). Using WebP format provides superior compression and quality compared to formats such as JPEG or PNG.
- Local vs. Remote Images – Local images load faster and are more reliable; remote images depend on external servers.
- Optimize for Performance – Compress images, use descriptive filenames, and prefer local hosting for speed and SEO.
HTML Background Images
In addition to displaying images using the <img> tag, you can use CSS to manipulate images in other ways, such as setting a background image. Background images are primarily used for decorative purposes, such as adding textures, gradients, or patterns to enhance the visual appeal of a website. To add a background image to HTML, you can use:
- the
styleattribute for the desired HTML element with thebackground-imageproperty; - the
<style>element with background image information for a document, or part of a document, into the<head>element.
Background Image for an Entire Page
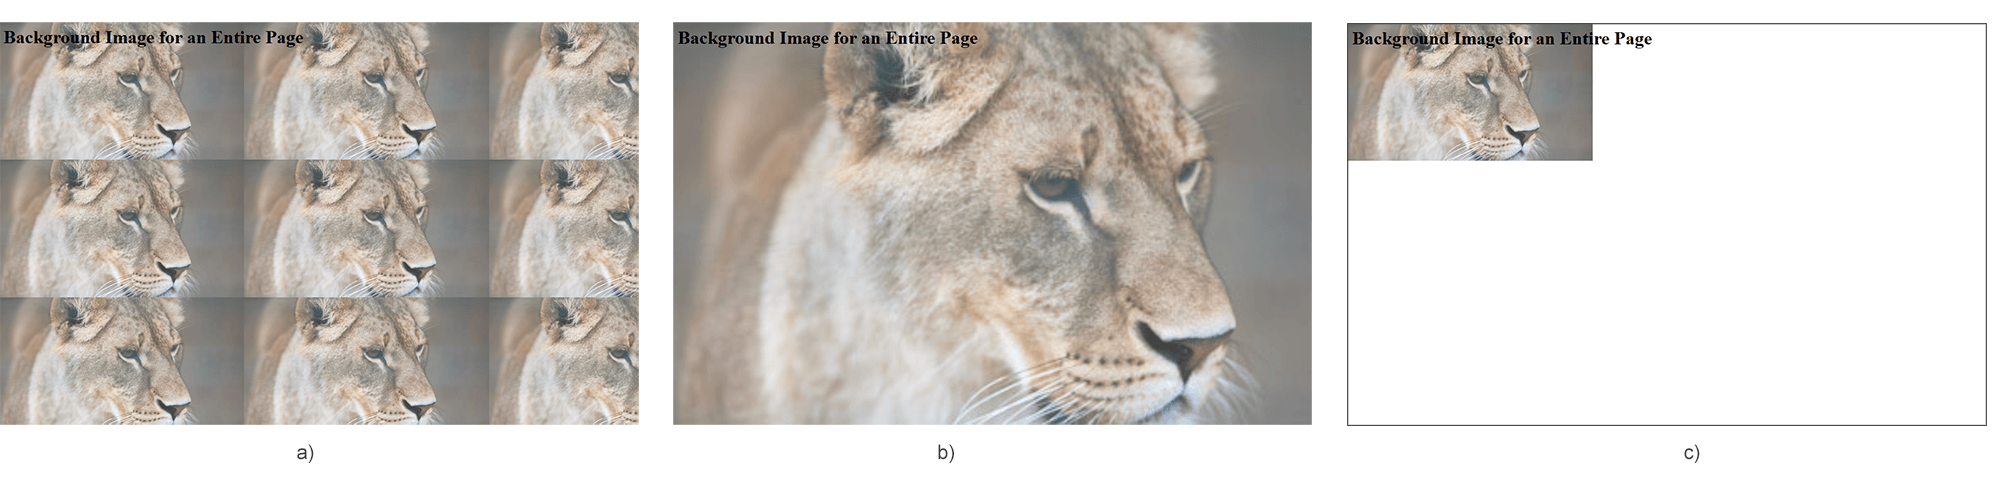
If you want to add a background image to the entire web page, you can set the CSS background-image property on the <body> element within the <style> element. By default, a background image will repeat if it is smaller than the specified element, in this case, the <body> element:
 1<html>
 2	<head>
 3		<style>
 4			body {
 5				background-image: url("lioness.png");
 6			}
 7		</style>
 8	</head>
 9	<body>
10		<h1>Background Image for an Entire Page</h1>
11	</body>
12</html>
If you want the background image to cover the entire element, you can set the background-size property to cover:
1body {
2  background-image: url("lioness.png");
3  background-size: cover;
4}
To avoid repeating the background image, set the background-repeat property to no-repeat:
1body {
2  background-image: url("lioness.png");
3  background-repeat: no-repeat;
4}
The following figure illustrates three computer screens (decreased) with background images that were added using the background-image property with default settings (a), background-size: cover (b), and background-repeat: no-repeat (c) properties:
Note:
Background images are purely decorative and do not require attributes such as alt, width, or height, as they are not part of the actual page content. Unlike images inserted using the <img> tag, background images do not convey meaningful information to users and are not read by screen readers, making the alt attribute unnecessary for accessibility. Additionally, their dimensions are controlled via CSS, so there is no need to explicitly define width or height.
Background Image for an HTML Element
A background image for an HTML element is specified using the CSS background-image property, allowing it to be applied to elements such as p, div, body, or section. You can control the positioning of a background image with background-position, adjust the scaling with background-size, and improve responsiveness with background-repeat.
The following Example 1 shows how to add a background image to a <p> element using the style attribute and the background-image CSS property:
Example 1
1<p style="background-image: url('winter.png'); "> A background image for an HTML element is set using CSS with the background-image property...</p>The following example 2 shows how to add a background image to a <div> element using the <style> element in the <head> of the document and the background-image CSS property:
Example 2
 1<html>
 2	<head>
 3		<style>
 4			div {
 5				background-image: url("winter.png");
 6			}
 7		</style>
 8	</head>
 9    <body>
10		<h1>HTML Background Images</h1>
11		<div>
12			<h2>Background Image for an HTML Element</h2>
13			<p> A background image for an HTML element is set using CSS with the background-image property, allowing you to apply images to elements like div, body, or section... </p>
14			<br>
15		</div>
16	</body>
17</html>
The following figure shows the result of rendering Examples 1 and 2: the background image is added using the style attribute to the <p> element (a); the background image is added using the <style> element and applied to the <div> element (b).

Summarize
- Background images are useful in web design when decorative visuals are needed without affecting the document’s structure.
- Use the CSS
background-imageproperty to add images to elements like<body>,<div>, or<p>. This can be done inline in the element’sstyleattribute, in a<style>block, or in an external CSS file. - No alt attribute is needed. Background images are decorative, not part of the content, so they do not require
alt,width, orheightattributes. Accessibility tools do not read them. - Background images can slow down page load times, especially if they are large or unoptimized. To improve performance, use modern image formats like WebP for better compression.
Adding Images via JavaScript
While using the <img> tag is simpler for static content, JavaScript is the better choice when images need to be added or modified dynamically.
 1<html>
 2	<body>
 3		<h1>Adding Image via JavaScript</h1>
 4		<script>
 5			// Create a new image element
 6			let img = document.createElement("img");
 7
 8			// Set the image source
 9			img.src = "https://docs.aspose.com/svg/images/api/lioness.jpg";
10
11			// Set alternative text, width and height for accessibility and SEO
12			img.alt = "The muzzle of a lioness close-up. The lioness looks away.";
13			img.width = 350;
14			img.height = 200;
15
16			// Append the image to the body
17			document.body.appendChild(img);
18		</script>
19	</body>
20</html>
While using the <img> tag is simpler for static content, JavaScript is the better choice when images need to be added or modified dynamically. Adding images via JavaScript enables conditional loading, and lazy loading, improving performance and flexibility. Unlike static <img> tags, this approach allows for error handling, real-time updates, and better maintainability in interactive applications.
Using Inline SVG for Vector Graphics
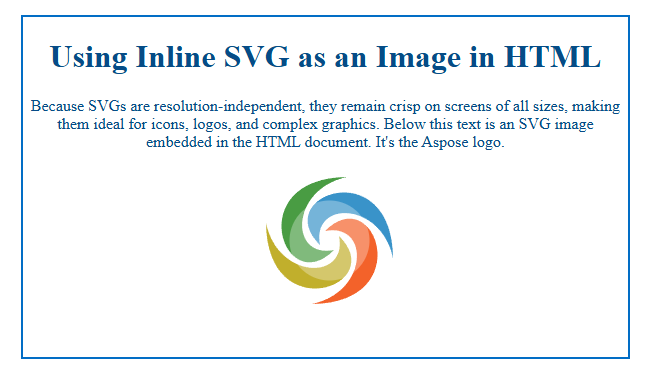
Using inline SVG in HTML allows you to embed scalable vector graphics directly into your document without the need for external image files. Since SVGs are resolution-independent, they remain sharp on all screen sizes, making them ideal for icons, logos, and complex graphics.
 1<html>
 2	<head>
 3		<style>
 4			.page {
 5				width: 160mm;
 6				height: 90mm;
 7				border: 2px solid #026dc5;
 8				text-align: center;
 9			}
10			h1,p {
11				color: #054c87;
12			}
13		</style>
14	</head>
15	<body>
16		<div class="page">
17			<h1>Using Inline SVG as image in HTML</h1>
18			<p>Because SVGs are resolution-independent, they remain crisp on screens of all sizes, making them ideal for icons, logos, and complex graphics...</p>
19			<svg height="140" width="140" viewBox="-40 0 140 140" xmlns="http://www.w3.org/2000/svg">
20				<path d="M 25 78  C -26 28  97 -15  98 91 C 86 34 16 33 25 78" fill="#3993c9"/>
21				<path d="M 25 78  C -26 28  97 -15  98 91 C 86 34 16 33 25 78"  fill="#f3622a" transform= "rotate(90 30 64) translate(5 -14)"/>
22				<path d="M 25 78  C -26 28  97 -15  98 91 C 86 34 16 33 25 78"  fill="#c1af2c" transform= "rotate(180 25 78) translate(-19 9)"/>
23				<path d="M 25 78  C -26 28  97 -15  98 91 C 86 34 16 33 25 78"  fill="#499c43" transform= "rotate(-90 25 78) translate(-5 14)"/>
24				<circle cx="34.5" cy="73.5" r="40"   fill="white" fill-opacity="0.3" />
25			</svg>
26		</div >
27	</body>
28</html>
The following figure illustrates the HTML file written above. The file uses an embedded SVG, which is the logo of the Aspose company:
See Also
- In the article How to Add Image to HTML?, you will learn how to insert an image in HTML using Aspose.HTML for .NET library.
- Discover the world of HTML color names! Learn about using HTML color names in web design and when to choose an alternative.
- The article How to change text color in HTML? shows how to use Aspose.HTML for .NET library to control the text color in an HTML document.
- In the article How to change background color in HTML? you will find C# examples demonstrating different ways to set or change the background color both for the entire HTML document and for its individual elements.
- The article How to change border color in HTML? discusses various ways to set or change the border color in HTML files using the Aspose.HTML for .NET library.