How to Create and Convert an XML File to PDF
Creating and XML File and Converting it to PDF
Step by step, this article walks you through the process of creating and XML file and converting it to PDF:
- Create an XML file.
- Create a PDF template.
- Load the XML template.
- Specify the path to the source path.
- Specify file properties.
- Export the file to PDF.
- Save the PDF file.
Step 1: Create XML File
First create an XML file based on the Aspose.PDF for .NET Document Object Model.
According to Aspose.PDF for .NET DOM, a PDF document contains a collection of Section objects, and a Section contains one or more Paragraph elements. Text is a Paragraph level object and may contain one or more segments. Below, a sample text string is added to a Segment object and added to a Text object. Finally, the Text element is added to the Section object’s paragraphs collection.
XML
<?xml version="1.0" encoding="utf-8" ?>
<Pdf xmlns="Aspose.PDF">
<Section>
<Text>
<Segment>Hello World</Segment>
</Text>
</Section>
</Pdf>- Log in to the SharePoint site.
- Select Site Action and All Items.
- Select the Create option and select PDF Template from the list.
- Enter a template name.
- Click Create.

Step 3: Load XML Template
Once the template has been created, load the XML file:
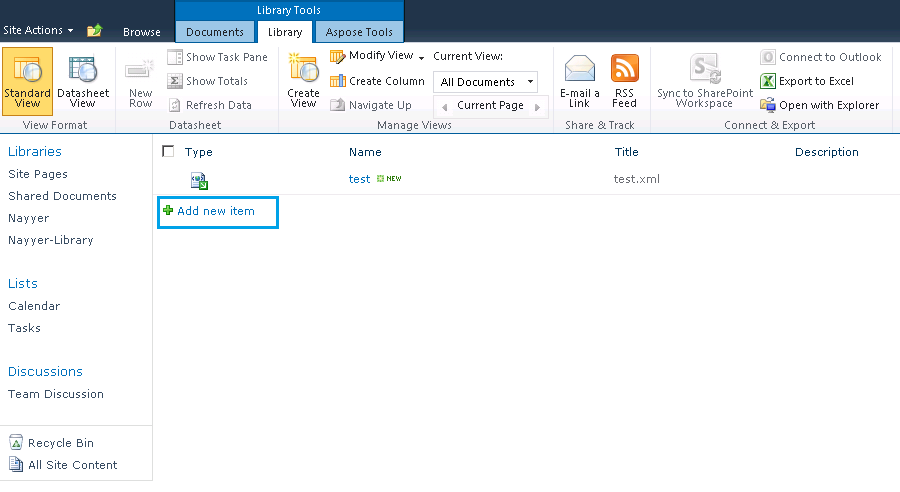
- On the PDF template page, select Add new item.

Step 4: Specify Source File Path
In the document upload dialog:
- Click Browse and locate the XML file on your system. You may enable the check box to overwrite existing file option.
- Press OK button.

Step 5: Specify File Properties
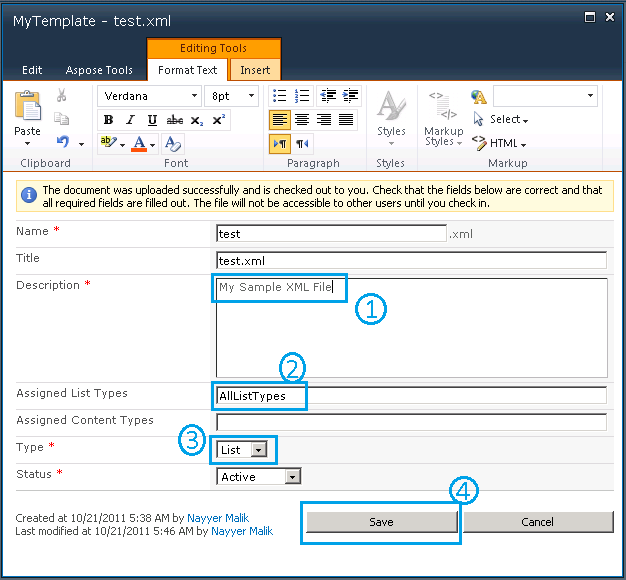
When the file is loaded, add information into the mandatory fields (marked with a red asterisk: *).
For this example, a sample description had been added and the following fields completed:
- A brief description of the document.
- Enter AllListTypes for the Assigned List Types field.
- Select List from the Type menu. Make sure that the status remains Active.
- Click Save to save the properties.

Step 6: Export to PDF
When the XML file has been added to the PDF template: Either:
- Right-click the test.xml file.
- Select Export to PDF from the menu.
Or:
- Select Aspose Tools from the Library Tools.
- Click Export.

Step 7: Save PDF Document
- In the Export to PDF dialog, select Template storage (the location where source file is stored).
- Select the file to export from Template name menu.
- Click Export to PDF to save the final PDF document.

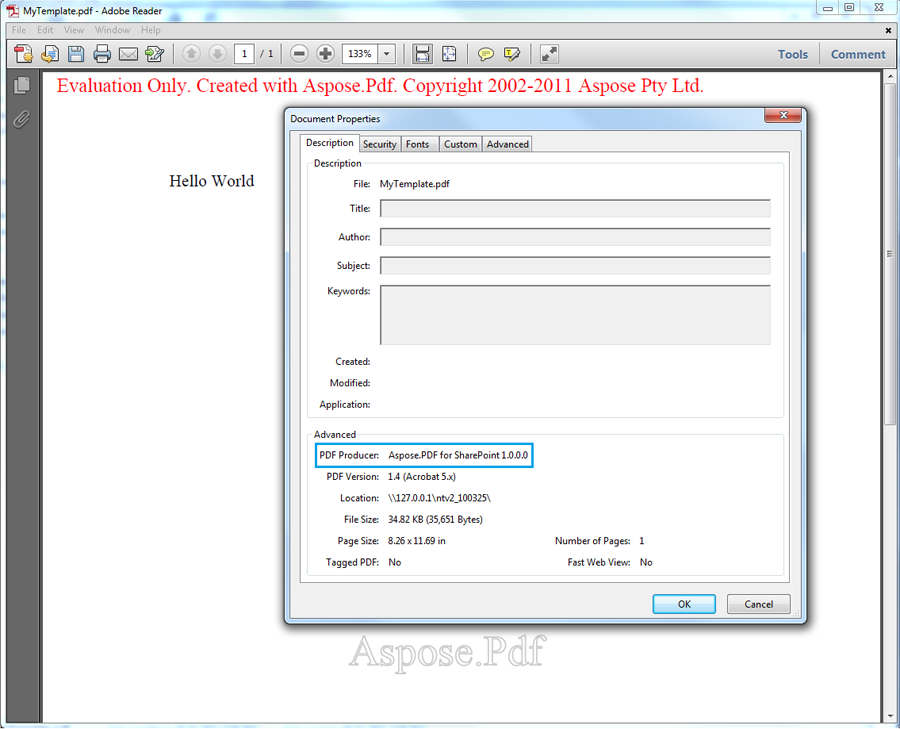
Open the PDF
The PDF document has been saved and can be opened. In the image below, note the phrase “Hello World” that was in the {segment] tag in the XML. Also note that the PDF Producer is Aspose.PDF for SharePoint.
